If you hadn’t figured it out from my blog name, I love burlap. It’s versatile yet inexpensive, simple yet classic, and can fit in with any decor style, from modern to farmhouse, shabby chic to contemporary. Recently, I’ve been smitten with the contrast of rugged burlap and sweet ruffles. And so, with an ottoman gifted to me from my mother-in-law, I went to work!
Disclaimer: I am not a seamstress, I am not an expert at the sewing machine, and I am sure there are (much) better ways to complete each step…I am just showing you what worked me for (and it definitely worked!) If you know of a better faster, easier way, please share in comments!
Materials needed:
an ottoman
about a yard of burlap, depending on the size of your ottoman
thin, cotton fabric for the ruffle, maybe a quarter of a yard
any cheap fabric (I used muslin) to line the ottoman with (Only needed if your ottoman, like mine, had already been covered and you are too lazy to pull off what is there. Burlap does have small holes in it, so a neutral base is best. Any dark, bright fabric will probably show through the burlap)
glue gun or staple gun
Step 1: If needed, cover ottoman with any plain, neutral-colored cotton fabric. You can see the original red, green and yellow fabric underneath my fabric, but it doesn’t show when covered with the burlap.
The original goal was to use a staple gun, but the staples didn’t go through the frame of the ottoman like I needed them to, so I switched to my trusty hot glue gun.
As you can see below, I was very precise, careful, and meticulous (not). In actuality I just cut off the bulk of the excess fabric, folded the fabric over and glued. The best part is that it doesn’t matter and no one will know.
Step 2: : Lay burlap over ottoman, cut off excess. If the burlap had a right side and a wrong side, I would instruct you to lay it wrong side down., but it doesn’t matter in this case.
The ruffle will add about an inch and a half or so to the burlap. I basically covered the ottoman with the burlap to just about reach the legs. I figured the extra length I’d gain with the ruffle would make the length about right.
Step 3: Pinch excess fabric at corner of ottoman and pin. This is the line you will be sewing.
Repeat for all four corners. You do not want to pull too tightly, or you may have difficulty getting the slipcover on and off. I also did not want my slipcover too baggy. I just pulled the excess fabric gently and pinned.
Sew a straight line down the burlap where you just pinned. Repeat for all four sides. Cut off excess fabric to eliminate bulk. Can you see the sewn line in the picture below? I hope so:)
Step 4: Make your ruffle! Fabric will be folded over in half to make ruffle, so I cut strips of fabric about 4 inches wide. This will make a ruffle approximately 2 inches wide.
After allowing a bit for seam allowances, your ruffle will hang down approximately 1.5 inches on finished slipcover. Begin by cutting long strips of fabric. I think the rule of thumb is to cut a piece of fabric that is double the length of what you will need.
For example, if you need a ruffle that is 80″ long, you will need a length of fabric that is 160″ long. So cut your strips of fabric, fold over and iron to make a nice crease (or not, if you prefer). And you should know I did this in three separate sections.
It is very frustrating to break a thread while gathering fabric, and the longer your piece of fabric that you want to gather, the more likely this is to occur.
Then, once you have your lengths of fabric creased and ready to go, go to your sewing machine, lengthen your machine stitch to the longest setting, and sew a line down the length of your fabric, about 1/4 inch from the end. I set my machine to 6 stitches per inch.
Again, not sure if that is at all the correct way to do it, but it worked for me. You do not want to backstitch on either end!! Make sure to leave long threads on each end…see following two pictures. This is important as you do not want to start pulling threads on one end and end up pulling them through the ruffle at the other end (I hope that makes sense).
This is my fabric before I started gathering…the machine did most of the work for me.
Once you have sewn down the length of your fabric on all three pieces (or however many you decide to do), start at one end and gently pull the threads and slide the fabric down the threads as you are pulling.
This will cause the fabric to ruffle. I stop when I have about half the fabric ruffled, tie off the two threads, and repeat for the other end. Play with it until the ruffles are as tight or loose as you want them!
Step 5: Sew lengths of fabric together (right sides together) and press seams open to connect fabric lengths to make one long ruffle strip.
And yes, there will be exposed seams on the backside of the ruffle, but, again, it is the backside and no one will notice!
Now the next step should be to sew a regular stitch along the gathered edge to hold the ruffle in place. I skipped this step, as I knew I would be sewing the ruffle to the burlap shortly. You may not want to skip this step if you think the ottoman will get heavy use or you plan on washing the slipcover often.
Step 6: Pin ruffle along burlap slipcover right sides together. Using a regular stitch, stitch all the way around slipcover.
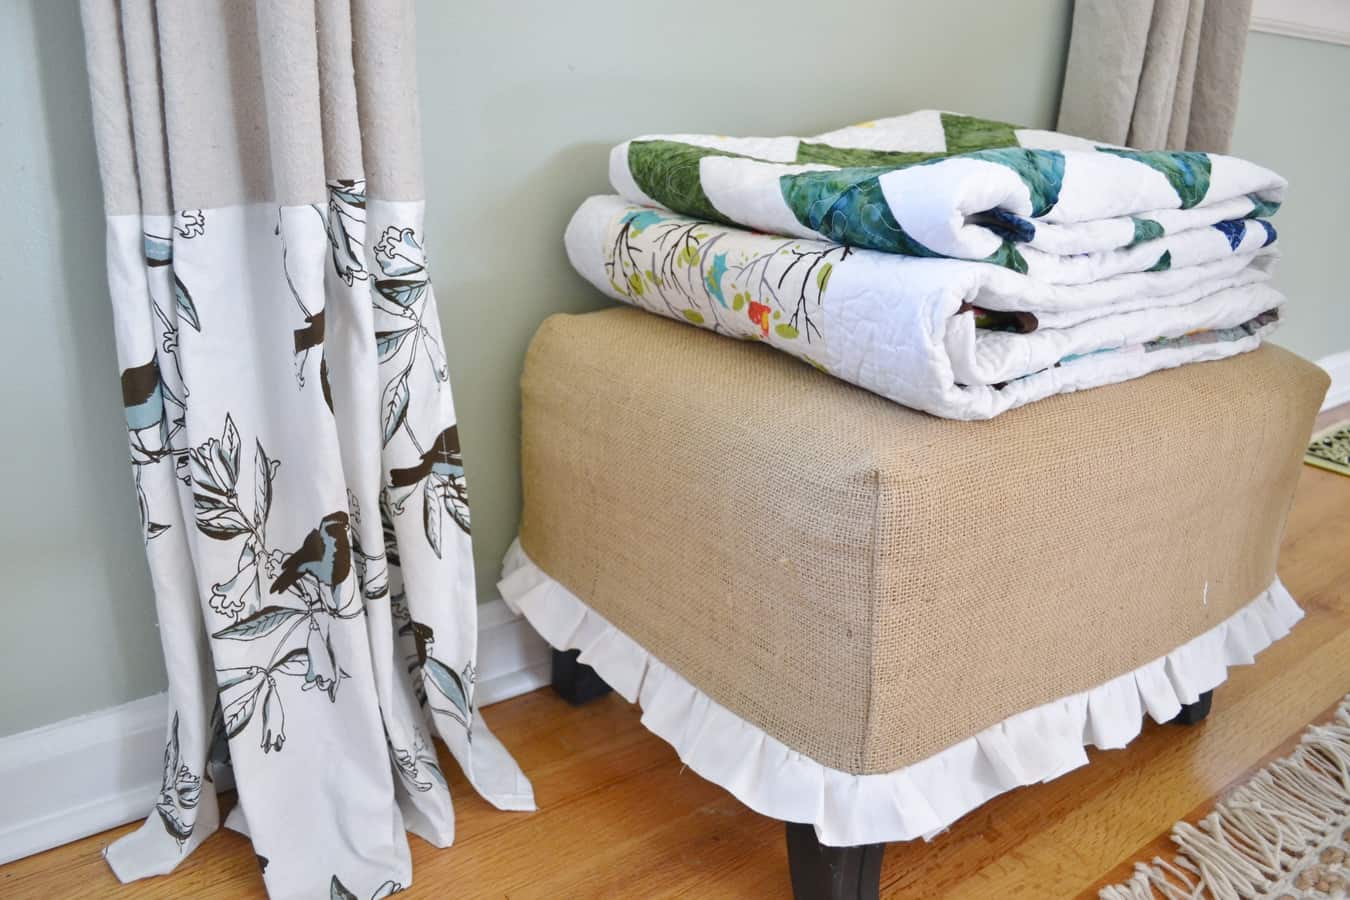
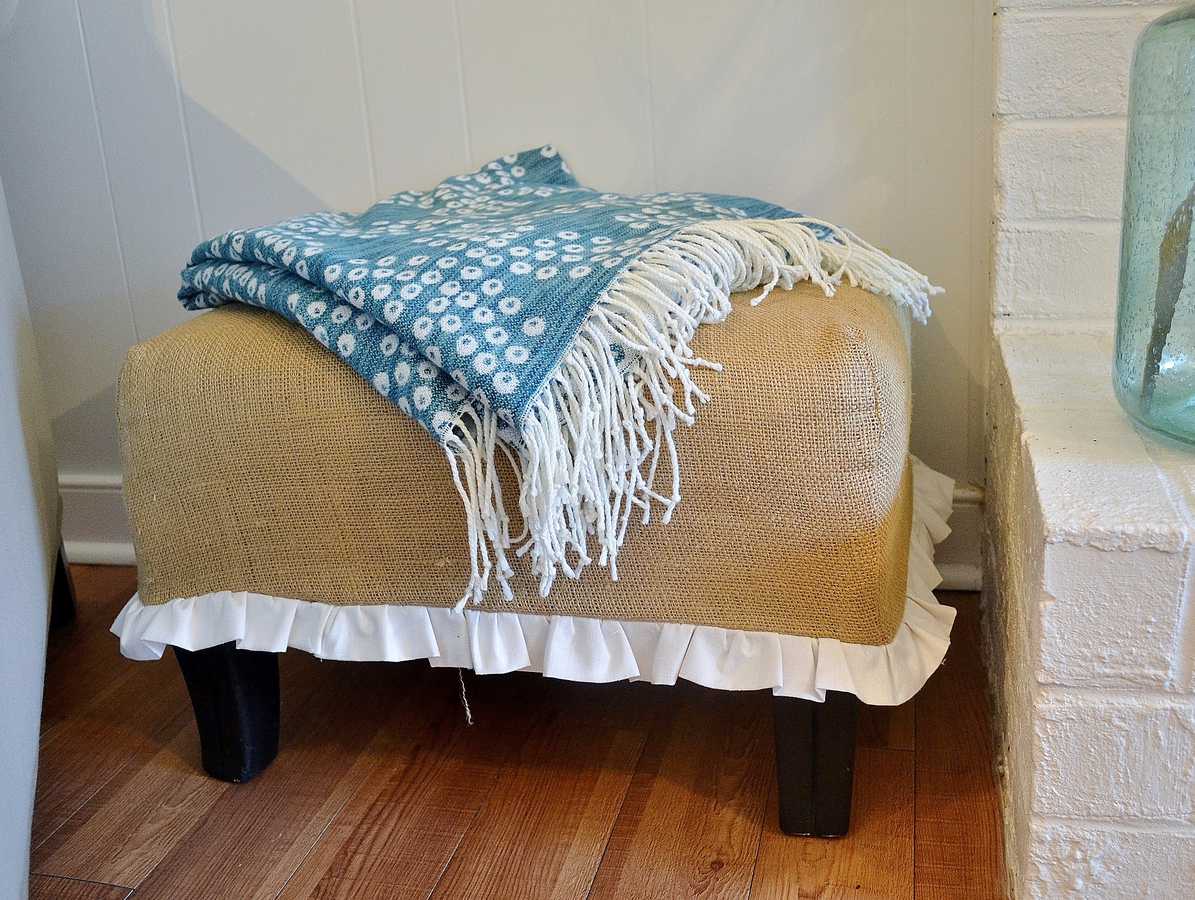
Step 7: Turn slipcover inside out, place over ottoman, and be proud of the fact that you spent about $5 (less if you have burlap lying around) for something that looks like it cost so much more!


Ontario, Canada Granny
Thursday 25th of April 2019
Thank you for a wonderful project. My puppy cannot yet, jump onto the bed, so I am using an old footstool. I purchased extra fabric when creating my new duvet cover and drapes, in the hope of creating a slipcover for the footstool, but, despite my modest sewing skills, I was too intimidated to try. Your project, and clear instructions has inspired me to tackle the project. Tomorrow’s project for this newly retired granny. I am also considering the flirty ruffle. Thank you for the impetus to get this project completed.
burlap+blue
Thursday 25th of April 2019
Thanks for your kind comment! I'm so glad this project inspired you. Have a great day!
Irene
Friday 20th of April 2018
I have an absolute OBSESSION with Burlap! I'll be doing thos tomorrow.
25 Fun & Easy Burlap Decorating Ideas For Your Home
Thursday 1st of March 2018
[…] this Burlap and Blue tutorial, you can easily make a burlap ottoman cover with ruffles at the […]
Erin
Thursday 2nd of December 2010
ABsolutely adorable and elegant and gorgeous!!! :)
I'm just finding your blog....love your style!
Marie
Saturday 11th of September 2010
Thank you so much for the inspiration! I had an old ottoman that was almost going to get sold at a yard sale. My hubby told me to hang on to it and I am so glad I did. I made my own burlap and ruffle slipcover for it. Here's the link if you want to check it out: http://marievilla.blogspot.com/2010/09/my-new-reading-spot.html