I’m always (always!) looking for new wall art for around the home.
This Instagram canvas photo display was the perfect afternoon craft project, and, best yet, used things I already had around my craft room (plus, I got to play with watercolors-always a good thing).
Materials:
instagram photos
11×14 canvas
watercolors + paper (you could also use scrapbook paper)
Mod Podge
Step 1: Gather your photos. I used Photoshop to crop my photos to 2×2.
I also watercolored paper and cut those to 2×2 as well. I used 27 full 2×2 squares for my 11×14 project (plus a few scraps for the sides).

Step 2: Layout your squares on your canvas, alternating images with watercolor paper. Don’t watercolor? No problem. Scrapbook or wrapping paper would work well here.
The idea is just to add some color and pattern to your canvas.
Step 3: Take your trusty Mod Podge and start adhering your squares to your canvas. This step is much easier if you use thinner paper for your photos and watercolor squares. The corners of thicker paper may take a moment or two of pressing down to adhere to the canvas.
Once done, apply 2-3 thin coats of Mod Podge to your entire canvas. Let dry completely between coats.
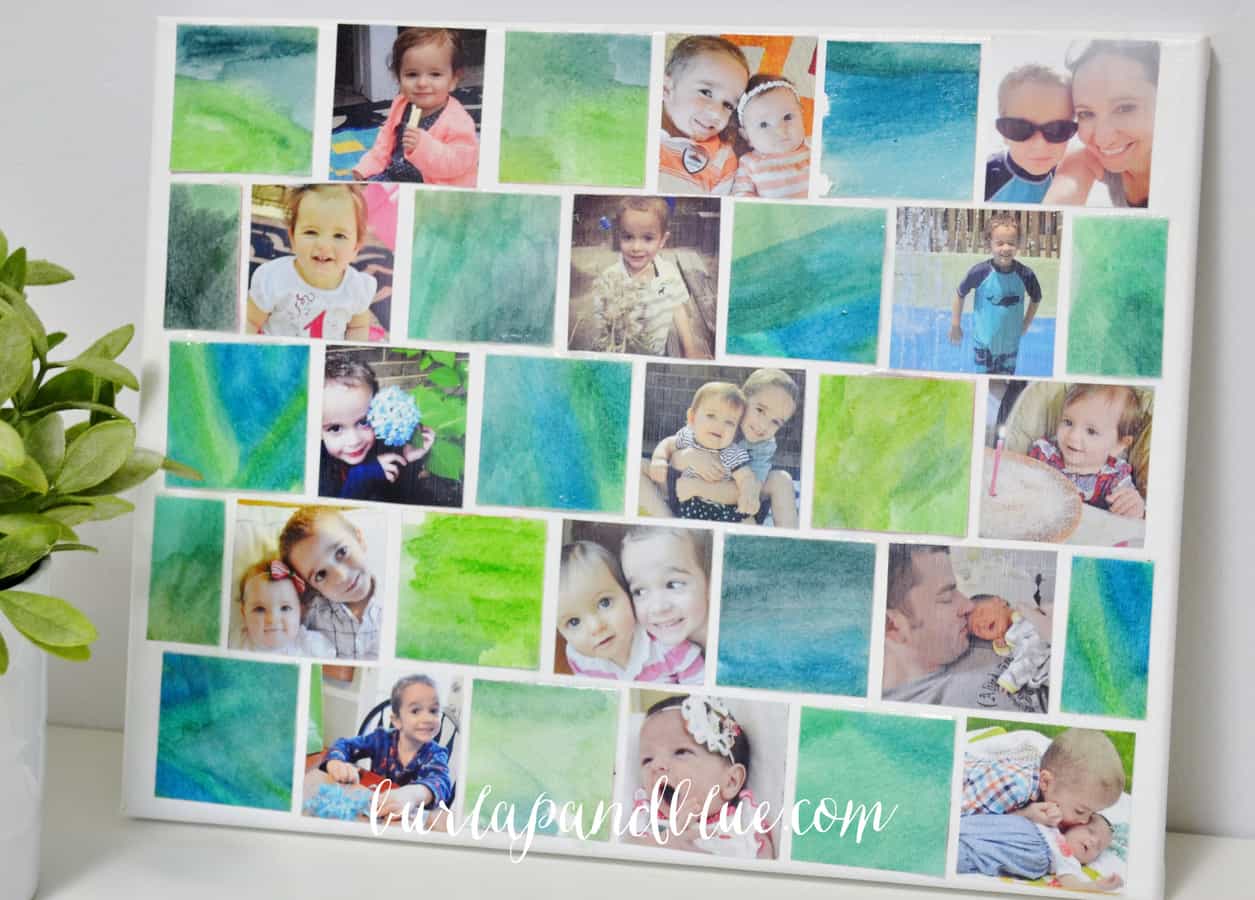
I love the fun, whimsical nature of this piece, and the colors and patterns of the watercolors add so much life and personality to this piece!
Thanks for reading all about my instagram canvas photo display! Have a crafty day!