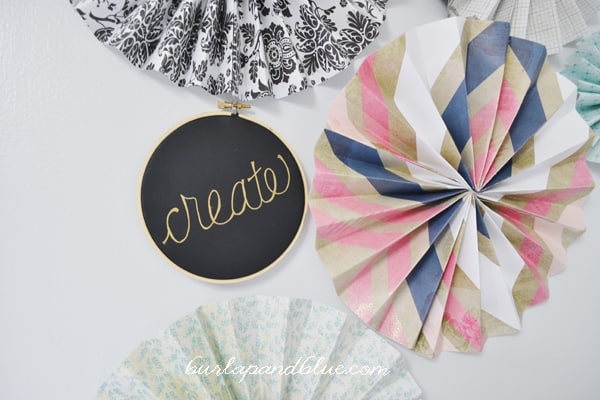
white plate wall + the cheaters way of hanging plates

I’ve wanted to create a plate wall in my home for a while now, and while I’ve always hung plates on the wall, it’s never been a focal point….I think making all those holes in my wall makes me a bit nervous. I don’t like doing much to my home that I can’t undo when I feel like it. But, last week, I had time on my hands, and a whole slew of plates hanging around that weren’t being used, so, I took the plunge….

plate wall 3 white plate wall + the cheaters way of hanging plates

Like I said, I had all of these plates on hand…I just took some gloss white spray paint to the few that weren’t already white. Once I had everything painted, it was time to figure out how I was going to hang them. Now, don’t get me wrong, I love using Disc Hangers to hang my plates…I even wrote an entire post on using them.  But, I didn’t have enough lying around the house, I was too lazy to load two kids up for an outing to buy more, and I wanted to keep the project virtually cost-free. So, I took a bent paper clip, piece of felt, and lots of hot glue, and came up with this….

plate hanger white plate wall + the cheaters way of hanging plates

Am I saying this will hold forever or that you should hang your great-grandma’s treasured heirloom plates using this method? No. But, so far, we’ve only had one casualty, and that was my fault for trying to hammer a nail into a stud without taking all the plates down first (oops).

To figure out placement, I just played with the arrangement on the floor until I was happy with it. At first, I thought I might want to do an overlapping, layered plate wall a la Nester

plate wall white plate wall + the cheaters way of hanging plates

…but ended up liking a more traditional arrangement….

plate wall 2 white plate wall + the cheaters way of hanging plates

To figure out where to put the nails in, I use a simple, but effective trick…I take a piece of painters tape, fold it over, and attach it to the top of the paper clip (or ring) where the nail will go (see pic). I take the plate, tape attached, and press it to the wall exactly where I want the plate to go. The tape unsticks itself from the plate, sticks itself to the wall, and I just hammer a nail into it.

plate hanger2 white plate wall + the cheaters way of hanging plates

DSC 0006 3 white plate wall + the cheaters way of hanging plates

Oh, and here’s a close up of one of my favorite elements of this space….

Capture1 white plate wall + the cheaters way of hanging platesIt’s  from Lara Casey and I just adore it.

Hope you are having a great Monday!!!

xoxo

ad white plate wall + the cheaters way of hanging plates  cts white plate wall + the cheaters way of hanging plates  fb white plate wall + the cheaters way of hanging plates


Pin It

the dropcloth window treatment (re)post

Hello, Lovelies! I’ve gotten a few compliments/questions about my living room window treatments lately, so I wanted to share this post from three years ago with you all…and you know the window treatments are a winner when they’re still up three years later:)

quilts ottoman the dropcloth window treatment (re)post

I’ve been eyeing the drop cloth curtain trend for a while now. And though I have two windows in my living room that are treatment-less, I never felt as though they needed anything on them….at least not until I saw this tablecloth on Target’s clearance rack the other day.

123582038 the dropcloth window treatment (re)post

I bought two, not quite knowing what I was going to do with them. After getting home and realizing that they worked perfectly in my living room, I knew what had to be done. Enter two of these…

 the dropcloth window treatment (re)post
…a couple of rods from Target, four packs of ring clips, and a child-less afternoon, and my living room went from this…
 the dropcloth window treatment (re)post
to this…
DSC 0008 2 the dropcloth window treatment (re)post
quilts ottoman the dropcloth window treatment (re)post
So I know that everyone says this…but the room feels so much more finished now. I honestly don’t know why I didn’t tackle this project sooner.

As these are very, very basic panels, I do not have a full tutorial for you, but just a couple of tips if you want to try this yourself. First, err on the side of too wide for your panels. My windows are 45″ wide each, and I made each panel approximately 50″ wide…equalling the length of your window for each panel will give you nice, full panels. Also, make sure you hang your rods high! Higher rods will make your room feel larger and taller-always a good thing. I actually kinda wish we had hung our rods a bit higher now that I am looking at it finished. Last tip? Definitely prewash, but don’t worry about ironing…the wrinkles mostly fell out overnight thanks to gravity.

In case you are wondering about the cost breakdown, here it is:

rods-$13 each from Target
tablecloths-$10 each, also from Target
drop cloths-20 each from Home Depot (9″x12″)
ring clips-$30 from Target (will need 4 packs)

Total: approximately $116, with plenty of fabric leftover

Lastly, here’s the link to the tablecloths on Target’s website. Out of the two Targets I checked, only one of them had these on clearance…let me know if you are able to find them!

ad the dropcloth window treatment (re)post  cts the dropcloth window treatment (re)post  fb the dropcloth window treatment (re)post


Pin It