I love sharing my family’s favorite recipes on this blog. Here, you’ll find dessert recipes, appetizer recipes, crock pot recipes and more that you and your family will love!
On a cold, dreary day, there’s nothing quite like a warming bowl of soup. And among soups that everyone agrees are good, Rafferty’s Famous Potato Soup regularly ranks high on the list. So much that people search Google every day for copycat Rafferty’s potato soup recipes like this one! For those not in the know, …
Read More about Copycat Rafferty’s Potato Soup
If you haven’t made air fryer pop tarts before, this post is for you! Learn how to make easy snowman pop tarts perfect for your winter and holiday brunch celebrations! Air fryers are one of the most popular kitchen appliances right now, and for good reason. Not only are they so versatile, but they allow …
Read More about Air Fryer Snowman Pop Tarts-Fun Snow Day Recipe
This easy Halloween snack idea is perfect for kids and only uses three ingredients! Make these Babybell Mummies for a class party, Halloween party or after school snack. Sometimes, simple is truly the best. These Babybel Cheese Mummies are a quick and easy Halloween treat kids will love! Full recipe card is below! All you …
Read More about Easy Halloween Snack Idea for Kids (Babybel Mummies)
Looking for a vegan Christmas cookie recipe for your holiday event? In this post, we share some favorite vegan cookie recipes from top food bloggers! Christmas is near, and that means most of us are looking for great Christmas recipes to try. Thanks for reading all about our favorite Vegan Christmas Cookies Recipes. Have a …
Read More about Vegan Christmas Cookies Recipes
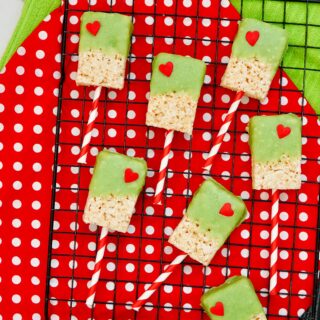
Looking for an easy Christmas treat inspired by How the Grinch Stole Christmas? These adorable Grinch Rice Krispie Treats are the perfect treat for Christmas dessert boards and classroom treats! If How the Grinch Stole Christmas is one of your favorite holiday books or movies, you are in for a treat! These Grinch-inspired Rice Krispie …
Read More about Christmas Grinch Rice Krispie Treats – An Easy Grinch Recipe
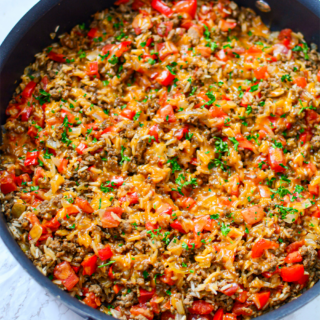
Looking for an easy weeknight meal? This ground beef and rice skillet dinner is quick, delicious, and be customized to meet your specific dietary needs. I don’t know about you, but I’m often in need of quick and easy weeknight meals, and this Ground Beef and Rice Dinner is one of my favorites! I love …
Read More about Ground Beef and Rice One Pan Skillet Dinner
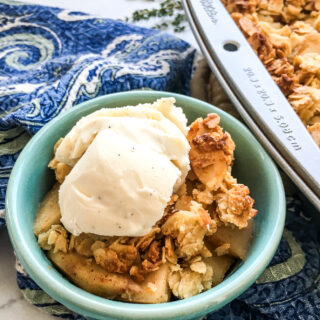
This baked cinnamon, gluten free apple crisp is an easy and delicious winter recipe! Perfect for a crowd, make this recipe for Thanksgiving, Christmas, or just-because. In colder months, I’m always on the lookout for easy, simple, and delicious dessert recipes. One taste of this delicious cinnamon apple crisp dessert and you’ve won’t believe it …
Read More about Easy, Gluten Free Cinnamon Apple Crisp – Perfect Winter Dessert Recipe!
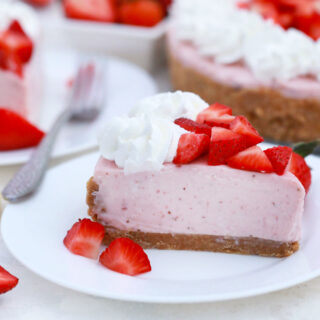
No Bake Strawberry Cheesecake is made with fresh strawberries and a delicious buttery graham cracker crust. The best part is that you can whip this cool dessert up the night before because it needs to chill for about eight hours anyway. The easy cheesecake recipe requires no baking, so you don’t have to worry about …
Read More about No Bake Strawberry Cheesecake Recipe
Love lemonade? Then this post is for you! Sharing the best lemonade recipes from some favorite bloggers for all of your warm weather beverage cravings! As I shared with you all on Tuesday, I love lemonade. And apparently, I’m not the only one. I’ve gathered a bunch of my favorite lemonade recipes from top bloggers …
Read More about Lemonade Recipes to Try
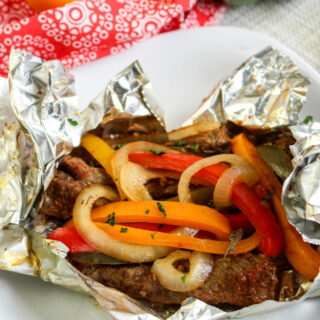
Looking for easy camping meals for your next camping trip? This post is for you! I’m sharing lots of tips and ideas to make your camping meals a success! It’s summer, which means a lot of you are planning camping trips! Camping trips are perfect for low-key getaways, and are ideal if you have a …
Read More about Easy Camping Meals {Camping Food Ideas to Try}