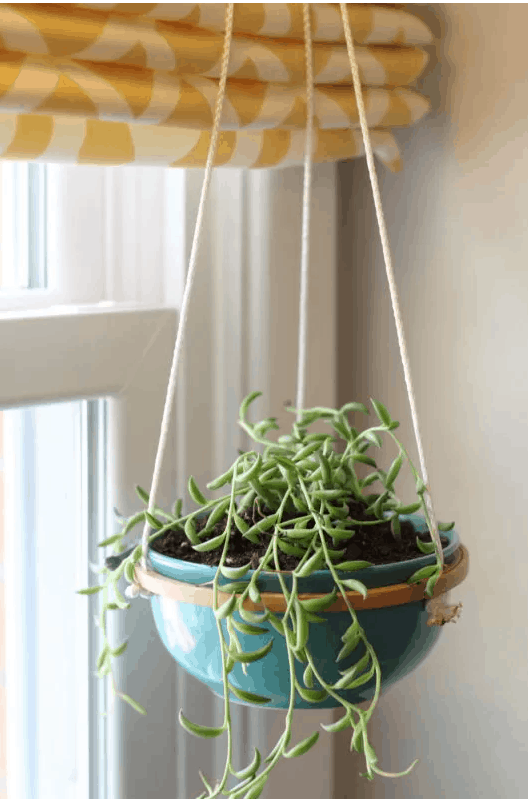
balsa wood sunburst mirror {a tutorial}

DSC 0006 3 copy balsa wood sunburst mirror {a tutorial}
I really love using mirrors in my home. I have at least one per room, and I love that they can be pretty, functional, and make the space feel larger. I have new mirrors, thrifted mirrors, DIY mirrors…and now this: an inexpensive, pick-your-color, balsa wood mirror that’s hanging in our bedroom….

DSC 0001 4 balsa wood sunburst mirror {a tutorial}
 Materials:
balsa wood (aka “craft” wood, found at Michaels or Hobby Lobby)
paint
foam brush
round mirror (found in the candle section)

DSC 0002 balsa wood sunburst mirror {a tutorial}

Step 1: Take your balsa wood strips and paint them in your colors of choice. I chose variations of blue/blue-green/teal to complement the grays/yellows in our bedroom, and added a bit of silver for good measure. I layered and mixed the colors and came up with something like this…

DSC 0003 3 balsa wood sunburst mirror {a tutorial}

Step 2: Cut your strips in half lengthwise, and then in sections approximately 4-6″ long. Balsa wood is thin, and should be easy to cut with a good pair of scissors.

DSC 0004 6 balsa wood sunburst mirror {a tutorial}

Step 3:Begin arranging wood strips in a circular pattern, leaving room in the center for the mirror, and varying the colors/widths of the strips.

DSC 0005 3 balsa wood sunburst mirror {a tutorial}

Step 4: Add a second layer of wood strips, cutting them a bit shorter than the first set of strips, and layering them in between your outer layer of strips. Start carefully hot gluing the strips to each other, as well as hot gluing the mirror to the center of the sunburst.

DSC 0007 3 balsa wood sunburst mirror {a tutorial}

Voila!

DSC 0007 4 balsa wood sunburst mirror {a tutorial}

DSC 0003 5 balsa wood sunburst mirror {a tutorial}

So easy and inexpensive…this mirror probably cost all of $10 (not including hot glue and paint, which I already had on hand).

So tell me-what spot in your home could use one of these pretties? What colors would you choose? I love the deeper blues of this mirror, but would love to see one in metallic as well!

ad balsa wood sunburst mirror {a tutorial}  cts balsa wood sunburst mirror {a tutorial}  fb balsa wood sunburst mirror {a tutorial}


Pin It

how to dye clothespins {a tutorial}

DSC 0002 6 copy how to dye clothespins {a tutorial}

Hello and happy Monday! We’re slowly adjusting to Life With a Newborn around here, and I’m hoping to be back here much more often than I have been as of late. So in that vein, I have a quick and easy tutorial to share with you all today on how to dye clothespins, wooden tags, or other small, wooden items.

Here’s what you need…

DSC 0006 4 how to dye clothespins {a tutorial}

Following the instructions on the dye packet, add the dye to a tub of water and add clothespins. Remember-this stuff does stain, so be careful, and wipe down all surfaces when you’re done dyeing:)

Don’t see the color you want? Use this handy Color Formula Guide to find your perfect color match.

Check clothespins every few minutes and remove them from the dye once desired color is achieved. I left mine in the dye for over half an hour…once you drain and rinse, the color gets a bit lighter, and I wanted mine saturated.

DSC 0008 2 how to dye clothespins {a tutorial}

Rinse clothespins, let dry, and you’re done! I used them to hang artwork in my kids’ bedroom.

masterpieces how to dye clothespins {a tutorial}

So simple and easy! Have a great day!

ad how to dye clothespins {a tutorial}  cts how to dye clothespins {a tutorial}  fb how to dye clothespins {a tutorial}


Pin It