Want to learn how to create free printables? You’ve come to the right place! In today’s post, I’ll share all I’ve learned through the years on how to create and share free printables!
Whether you’re a blogger wanting to attract a larger audience, or just someone who loves to design art for your own home, knowing how to create free printables is a skill that’s as much fun as it is useful. You can even use these techniques to create free printables to sell. I sold printables on Etsy for years, and there really is a lot of money to be made, once you start practicing. And once you know the basics, you can use your skills to create not only art, but invitations, banners, announcements, cards and more!
There are so many design programs out there that’ll let you create printable art, but I’m a huge fan of Photoshop Elements, so that’s the program I’ll use to create this tutorial. A lot of the steps are similar, though, if you’re more comfortable with a different program (there are many free ones that people love, such as canva and picmonkey). I’m sharing the step-by-step for two printables with you today, so let’s get started…
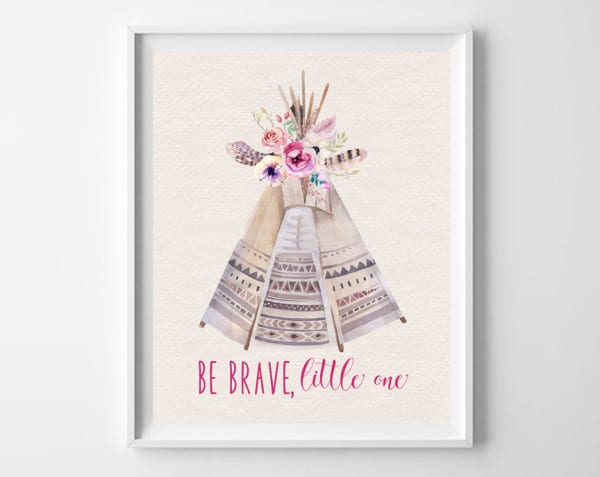
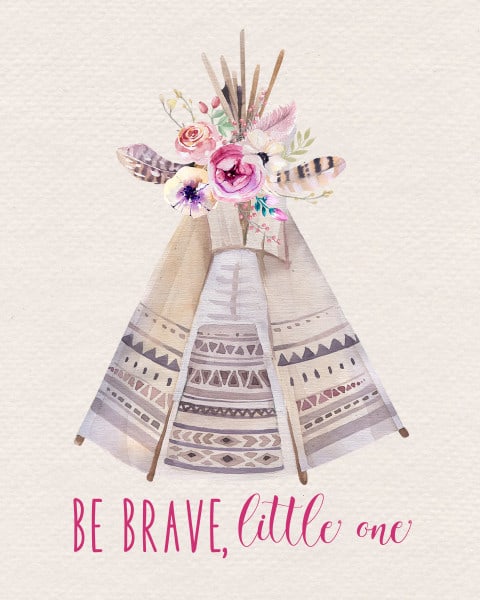
First up, let’s design this “be brave, little one” printable. This printable uses two fonts (Willshering Script & Merry Light, both from font bundles) and two design elements (the background and the teepee).
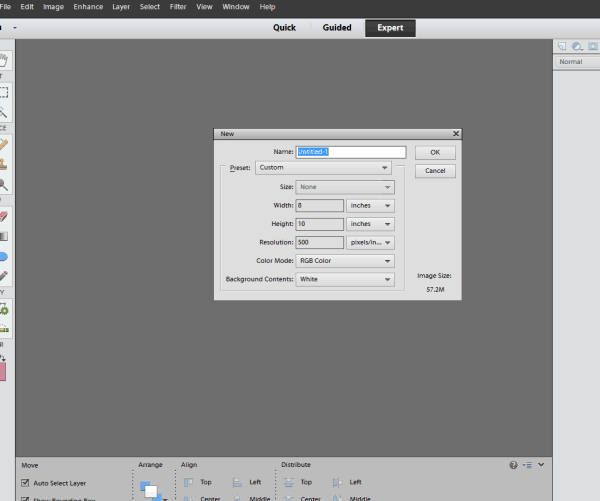
As always, when you open up Elements, you’ll need to create a new document. My go-to is to create an 8×10 file, though, obviously, you can create a file in whatever size you’ll need.
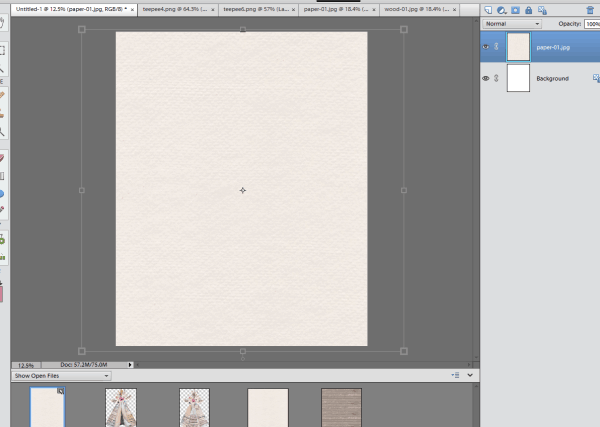
Once you create your file, you’ll have a blank, white document. Open in Elements any elements you’d like to use on your printable. You can choose to keep the background white, change it to a color, or add a background. I used this watercolor linen-look background. I just dragged and dropped the background from the Photo Bin (the open files that are visible at the bottom of the screen-see below) onto my background and sized it to cover the entire document.
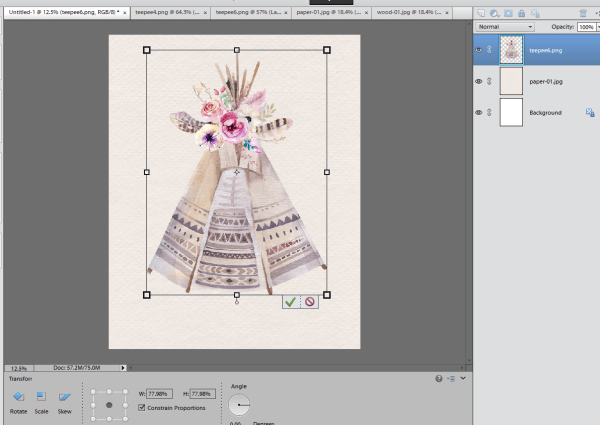
I then dragged and dropped the teepee clip art into my document and sized it to center on the document, with space underneath for my text. After sizing, just hit the checkmark to move onto the next step.
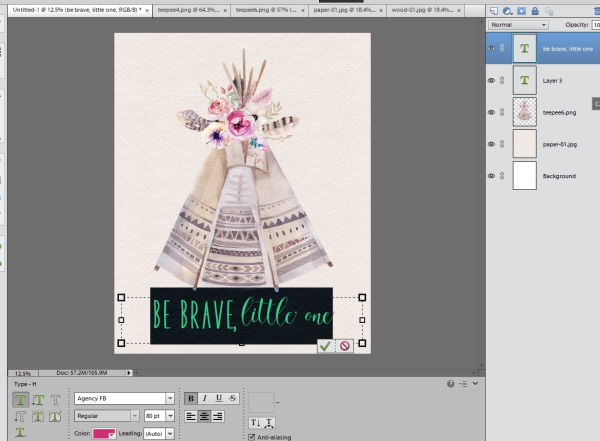
I love mixing and matching fonts to create eclectic printables that aren’t matchy-matchy. I chose the phrase “be brave, little one” and color-matched the dark pink in the florals for my text color.
Save to your computer as both a JPG and a PSD file (the PSD allows you to go back and make changes to your document, the JPG is what your readers will download). I also like to drag and drop the final image onto a blank picture frame so that readers can see what the piece will look like when framed.
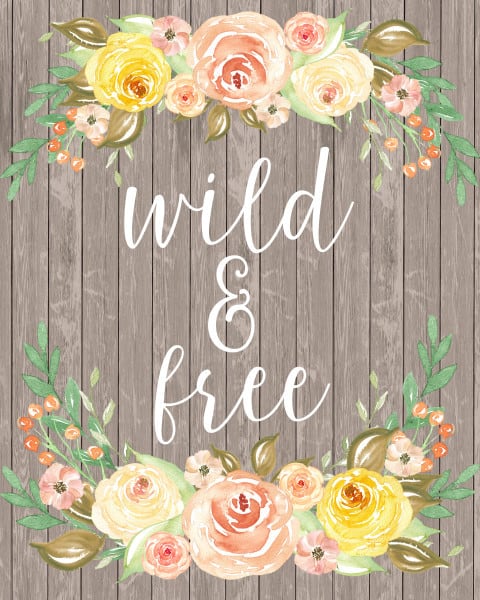
Easy, right? Next up, I created this “wild & free” printable. This printable uses one font (Vermaline), and three design elements, available from Design Bundles.
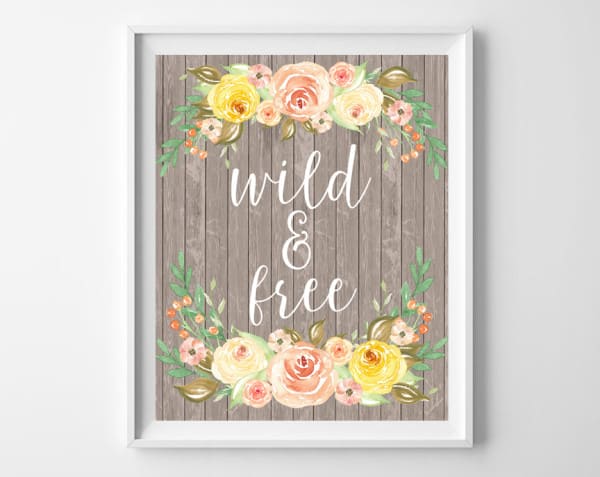
Just as you did for the last printable, open up all the design elements you need in Elements, and drag and drop your weathered wood background onto your new blank document.
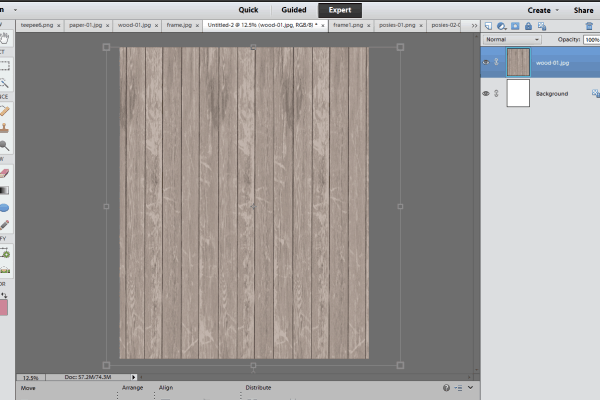
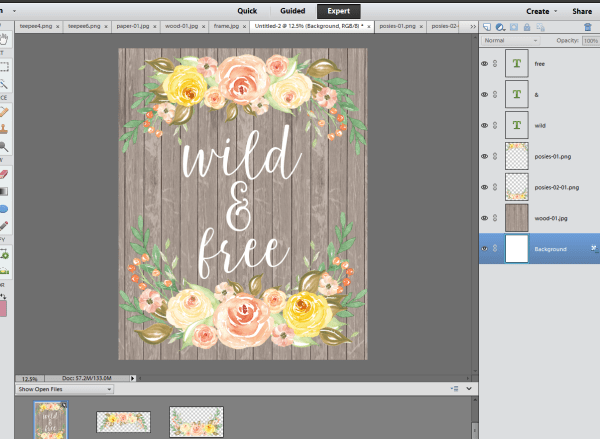
These floral elements are already “arranged” for you, you just need to drag, drop and place them onto your document (so, so easy!)
I like my text to stand out, so I used white text for this printable.
Save to your computer, and you’re ready to share your newest creation!
Speaking of sharing printable art, I use (and love!) Google Drive. In just a couple of steps, you can upload your files onto Google Drive, and click a button to get a sharing link to share with your readers. Once someone clicks your link, Google Drive will open up the printable file for them to print and frame!
I love to create free printables for my readers. Want to download and print these printables for your own use? Download the “be brave, little one” printable here, and the “wild & free” printable here!
As you start to design (and even sell) printables, you’ll have questions about how to best print your printables. I’ve created an entire post dedicated to how to print (and display) printables with all my best tips!
Thanks for reading all about how to create free printables! Have a fantastic day!
Want to learn how to create free printables? You’ve come to the right place!
Whether you’re a blogger wanting to attract a larger audience, or just someone who loves to design art for your own home, knowing how to create free printables is a skill that’s as much fun as it is useful. Once you know the basics, you can use your skills to create not only art, but invitations, banners, announcements, cards and more!
All of the elements I’m using for these printables come from Font Bundles and Design Bundles. The two are owned by the same company, and you can even use the same login for both. I’m using the Designers Revolution Bundle from Design Bundles, and The Fabulous Font Bundle from Font Bundles.
There are so many design programs out there that’ll let you create printable art, but I’m a huge fan of Photoshop Elements, so that’s the program I’ll use to create this tutorial. A lot of the steps are similar, though, if you’re more comfortable with a different program. I’m sharing the step-by-step for two printables with you today, so let’s get started…

First up, let’s design this “be brave, little one” printable. This printable uses two fonts (Willshering Script & Merry Light) and two design elements (the background and the teepee), all available in the bundles linked above!
As always, when you open up Elements, you’ll need to create a new document. My go-to is to create an 8×10 file, though, obviously, you can create a file in whatever size you’ll need.

Once you create your file, you’ll have a blank, white document. Open in Elements any elements you’d like to use on your printable. You can choose to keep the background white, change it to a color, or add a background.
I used this watercolor linen-look background available in the Designers Revolution Bundle. I just dragged and dropped the background from the Photo Bin (the open files that are visible at the bottom of the screen-see below) onto my background and sized it to cover the entire document.

I then dragged and dropped the teepee clip art into my document and sized it to center on the document, with space underneath for my text. After sizing, just hit the checkmark to move onto the next step.

I love mixing and matching fonts to create eclectic printables that aren’t matchy-matchy. I chose the phrase “be brave, little one” and color-matched the dark pink in the florals for my text color.
I recently shared some free fonts for cricut that you can use for printables as well!

Save to your computer as both a JPG and a PSD file (the PSD allows you to go back and make changes to your document, the JPG is what your readers will download). I also like to drag and drop the final image onto a blank picture frame so that readers can see what the piece will look like when framed.

Easy, right? Next up, I created this “wild & free” printable. This printable uses one font (Vermaline), and three design elements, available in the Designers Revolution Bundle.

Just as you did for the last printable, open up all the design elements you need in Elements, and drag and drop your weathered wood background onto your new blank document.

These floral elements are already “arranged” for you, you just need to drag, drop and place them onto your document (so, so easy!)
I like my text to stand out, so I used white text for this printable.

Save to your computer, and you’re ready to share your newest creation!

Speaking of sharing printable art, I use (and love!) Google Drive. In just a couple of steps, you can upload your files onto Google Drive, and click a button to get a sharing link to share with your readers. Once someone clicks your link, Google Drive will open up the printable file for them to print and frame!
I love to create free printables for my readers. Want to download and print these printables for your own use? Download the “be brave, little one” printable here, and the “wild & free” printable here!
If you’re serious about creating and sharing free printable art, be sure to check out the Designers Revolution Bundle and The Fabulous Font Bundle! The Designers Revolution Bundle includes over 3000 designs, and the Font Bundle includes 15 fonts. You can literally design hundreds and hundreds of printables with these elements.

Kristie Chiles
Wednesday 6th of June 2018
Hi your Printables Course looks amazing...I'm an Etsy Shop Owner (former schoolteacher turned full-time online entreprenuer), and I love promoting quality courses as an affiliate. Here's my Youtube channel - www.youtube.com/channel/UCWNBt8uAHG1Oz_CNjpjJp_g and my own Teachable course -
make-a-girl-y-blog.teachable.com/courses/etsyplusgearbubble/?preview=log...
and am successfully promoting my course and other people's products full-time online (grateful to be a 6 figure earner since 2014)
Do you have a course on creating stickers, printables or similar topics?
I would LOVE to promote your courses to my Youtube channel who love Printables as your affiliate? Warmly Kristie🍓
j
Wednesday 17th of January 2018
Thank you very much for the instructions! I believe i have PSE 9 and NO ONE gives instructions for PSE that I have found anywhere.
Kanadeia
Wednesday 26th of October 2016
Thank you thank you thank you!!! This is so easy to follow and just what I was looking for! #goals
burlap+blue
Wednesday 26th of October 2016
Thanks, Kanadeia! Best of luck!
Jenna
Tuesday 13th of September 2016
Your's are SO pretty!! Thanks for the tips - I needed them!